Goosh Buns
- 1 1/2 lbs ground beef
- 1 14-oz bottle catsup
- 1/2 green bell pepper, chopped
- 1 onion, chopped
- 2 Tbsp brown sugar
- 2 Tbsp vinegar
- 2 Tbsp prepared mustard
Brown meat and saute onion and pepper. Add remaining ingredients and simmer.
yield: 6 servings
Showing posts with label recipe. Show all posts
Showing posts with label recipe. Show all posts
Tuesday, December 6, 2011
Shafers' Goosh Buns
I got this recipe from a friend, who got it from someone in her husband's family. I suspect that there are many similar recipes floating around, but this one is perfection itself (in that it reminds me - in a wonderful way - of elementary school lunches where this would be called "barbecue on bun"):
Wednesday, September 22, 2010
putting the "Sichuan" in the green beans
We made a Cook's Illustrated version of Sichuan green beans this evening; for some reason, their Asian recipes always eliminate what they call the "foreign ingredients." (I suspect that anyone who's interested enough in cooking to attempt their recipes is more than capable of going to Penzey's and the asian section of the grocery store.) Anyway, I didn't change much in the recipe other than to replace the things that they used to replace Asian ingredients.
One of the substitutions I made was to use szechuan peppercorns instead of the called-for ground white pepper; I wasn't sure how much to use, however, and I think I didn't add enough. Next time - more pepper! The other substitution was that I used mirin instead of sherry, but I just did a straight-forward replacement there. It was great, and we're both looking forward to tweak it a bit in the future.
One of the substitutions I made was to use szechuan peppercorns instead of the called-for ground white pepper; I wasn't sure how much to use, however, and I think I didn't add enough. Next time - more pepper! The other substitution was that I used mirin instead of sherry, but I just did a straight-forward replacement there. It was great, and we're both looking forward to tweak it a bit in the future.
Sichuan Green Beans with Pork
adapted from Cook's IllustratedTo make the sauce, whisk together the soy sauce through dry mustard.
- 2 Tbsp soy sauce
- 2 Tbsp water
- 1 Tbsp mirin
- 1 tsp sugar
- 1/2 tsp cornstarch
- 1/4 tsp (or so) szechuan peppercorns, freshly ground
- 1/4 tsp red pepper flakes (either use very spicy ones next time, or increase the amount to 1/2 tsp)
- 1/4 tsp dry mustard
- 2 Tbsp vegetable oil
- 1 lb green beans, trimmed and cut into 2-inch pieces
- 1/4 lb ground pork (they suggest substituting 4 oz shiitake mushrooms to make it vegetarian; I think this would be a great addition in general)
- 3 garlic cloves, minced
- 1 Tbsp ginger, minced or grated
- 3 scallions, sliced thinly
- 1 tsp toasted sesame oil
Heat the oil in a large skilled over high heat. Add the beans and cook until tender with slightly shriveled and blackened skins (6-9 minutes). Transfer to a large bowl.
Reduce heat to medium-high and add the pork. Cook, breaking up the pork, until no pink remains. Add the garlic and ginger and continue stirring for another 30 seconds or so. Add the beans and the sauce (stirring if it looks like it started to separate) and cook until the sauce looks thickened a bit (just another few seconds). Remove from heat; add the scallions and sesame oil. Give it a final stir, and serve.serves 2 as an entree
Tuesday, September 14, 2010
blackberry-white nectarine jam
A few weeks ago, we went blackberry picking with a friend. We didn't have a tremendous amount of time, so our berry haul was slightly small, but the berries were at the perfect height of ripeness. I had planned to make Blackberry-Apricot Jam, but we were a little past apricot season here. There were some lovely white nectarines, though, so I used them instead. I also halved the recipe to accommodate my slightly smaller quantity of berries.
Using a food-mill (this is the one I got) to make the blackberry puree was surprisingly fast and easy. I am basically in love with the food mill now, and pretty much want to use it for everything.
Using a food-mill (this is the one I got) to make the blackberry puree was surprisingly fast and easy. I am basically in love with the food mill now, and pretty much want to use it for everything.
blackberry-white nectarine jamIn a large saucepan, combine fruit and sugar. Bring to a boil over medium-high heat, watching and stirring to avoid boiling over. Add cinnamon and lemon zest/juice and stir some more. After the mixture begins to thicken (perhaps 5-10 minutes longer), add the pectin and allow to boild vigorously for at least five more minutes.
- 2 C nectarine puree
- 2 C blackberry pulp
- 2 C sugar
- 1/2 tsp cinnamon
- 1/2 lemon, zested and juiced
- 1 packet liquid pectin (half a box)
Process in a boiling water bath canner for 10 minutes.yield: 5 half-pint jars
Sunday, September 12, 2010
the best applesauce ever
When Victor and I got married, one of our friends (an extremely eccentric friend...) gave us some frozen applesauce as a wedding gift. It was his mom's homemade applesauce, so bonus points for that, but it was also two years old. We didn't eat it, and we completely didn't understand why he thought it was a reasonable gift. I made some applesauce tonight that almost makes me understand why he felt he was giving us something of such great value.
The "recipe" here is beyond simple and imprecise; I think the important things are getting really excellent apples and using a food mill. We used freshly-picked Gravensteins and my brand-new Oxo food mill (purchased for making a jam that I'll write about very soon). This combination made by far the best applesauce I've ever made or eaten (if I do say so myself). I'm not quite ready to gift it to someone for their wedding, but I no longer think that present was completely insane, either.
The "recipe" here is beyond simple and imprecise; I think the important things are getting really excellent apples and using a food mill. We used freshly-picked Gravensteins and my brand-new Oxo food mill (purchased for making a jam that I'll write about very soon). This combination made by far the best applesauce I've ever made or eaten (if I do say so myself). I'm not quite ready to gift it to someone for their wedding, but I no longer think that present was completely insane, either.
Simple Microwave ApplesauceCombine all ingredients in a microwave-safe bowl and cook on HIGH for 10 minutes, or until very mushy. Run through a food mill. Enjoy!
- some apples (I had about 2 lbs Gravensteins), quartered and cored (NOT peeled)
- a splash of apple cider vinegar
- a splash of water
- a sprinkle of cinnamon (I actually used some pumpkin pie spice mix I had sitting around)
- a sprinkle of sugar
Monday, August 30, 2010
Jello Night!
A few weeks ago, my knitting group (which meets at the fantastic Fiber Gallery on Tuesday evenings) had a Jello themed potluck. We were inspired by this sort of vintage recipe: http://www.lileks.com/institute/gallery/knox/4.html. Instead of doing something disturbingly glistening, though, I decided to go in another direction. In the comments for this recipe, someone complained that the panna cotta tasted like "milky jello" and another commenter pointed out that panna cotta is milky jello.
Confident that this met our theme, I played around with several recipes and came up with a Lemon-Lavender Panna Cotta. (I'm on something of a lemon-lavender binge at present.) It would be delicious with blueberry sauce, but I guessed (correctly, as it turned out) that there would be lots of other sweet creations to pair it with. (If you happen to have some, it went pretty well with Blueberry Jello Surprise.)
Confident that this met our theme, I played around with several recipes and came up with a Lemon-Lavender Panna Cotta. (I'm on something of a lemon-lavender binge at present.) It would be delicious with blueberry sauce, but I guessed (correctly, as it turned out) that there would be lots of other sweet creations to pair it with. (If you happen to have some, it went pretty well with Blueberry Jello Surprise.)
Lemon-Lavender Panna CottaSprinkle gelatin over 1 C of the milk in a small saucepan. Put the lavender in a cheesecloth pouch or tea ball. Let the milk & gelatin stand for 10 minutes.
- 4 C whole milk, divided
- 1 1/2 Tbsp unflavored gelatin
- 1 Tbsp dried culinary lavender buds
- 2 Tbsp grated organic lemon zest
- 3/4 C sugar
Add the lavender and lemon zest and gently heat over medium-low heat for 10 minutes, whisking until gelatin dissolves. Keep stirring and increase heat to medium. Add the sugar and whisk some more, until the sugar dissolves.
Take off the heat and remove the lavender pouch, squeezing a bit to get more liquid out. Add the remaining 3 C milk and give the mixture one last good stir.
For an elegant presentation, pour into 8 6-oz ramekins and allow to chill at least 4 hours. When the mixture is completely set and chilled, invert each panna cotta onto a dessert plate. Pour berry sauce over the panna cotta, if desired. (For a potluck, it's much easier to just pour the hot mixture into a pretty serving bowl and scoop it out of there to serve after chilling.)serves 6-8
Friday, June 25, 2010
strawberry extravaganza
As I so often do, I ended up going a little overboard with the canning this weekend. This month's can jam is everything berries, and I'm thinking I should pick just one of the following recipes for my entry... it's so hard to decide, though! They all turned out wonderfully, but I think that the "oven-roasted strawberry jam with rosemary" is my favorite.
Two weeks ago, we went to our usual Sunday market, sampled strawberries from all the organic vendors, and found only one place with truly flavorful ones. (It's been so wet here that the berries are a little watery, I think.) Typically, they were also the most expensive strawberries at the market. I asked if they had any seconds, and it turns out that they bring all their seconds to the Saturday market and sell them by the bucket. With no idea what size that bucket was, we tentatively decided to go to the Saturday market the following weekend.
Here is what we ended up with on Saturday:

It wasn't labeled (other than with price - it was $20), and I neglected to weigh it or otherwise figure out precisely how much was in that big bucket. It took us about 3 hours to hull and quarter all the berries, enough to make 20 half-pint jars of jam, plus however many berries we ended up eating as we worked.
We spontaneously decided to break in our new pasta maker, so partway through the hulling process, Aaron came over and he and Victor made linguine:

(why didn't we cover the chairs? no idea)
Meanwhile, I divided the strawberries for different recipes and let them macerate. We ended up with:
- 5 x 8 oz jars Vanilla Strawberry Jam (I followed his recipe except that I added 1 split vanilla bean and its seeds during the maceration step)
- 2 x 8 oz jars Key-Lime Strawberry Jam (this recipe, but replacing the lemon juice with key-lime juice)
- 5 x 8 oz jars Strawberry-Rhubarb Jam (recipe follows)
- 4 x 8 oz jars Strawberry Preserves with Balsamic Vinegar and Black Pepper
- 4 x 8 oz jars Oven-Roasted Strawberry Jam with Rosemary (recipe follows)
Lazy Strawberry-Rhubarb Jam
adapted from Saving the Season
My adaptations mostly had to do with forgetting to keep the rhubarb and strawberries separated during the maceration (hence the "lazy" in the recipe title).Toss prepared rhubarb and strawberries with sugar, zest, and juice. Allow to macerate at least an hour (mine sat for maybe 5 hours - overnight would be fine, too).
- 1 lb rhubarb, sliced
- 1.5 lb strawberries, hulled and quartered lenthwise
- 2 C sugar (if using Pomona's Pectin, mix with 2 tsp pectin powder)
- zest of half a lemon
- 1 Tbsp lemon juice
- optional: 2 Tbsp Kirschwasser
- optional: 2 tsp calcium water (only if you're using Pomona's Pectin - if you are, this comes with the pectin powder)
In a large sauce pan, cook over medium heat for 20 minutes, stirring to prevent scorching. If you want a little fruity kick, add the Kirschwasser, too. (If you're using Pomona's Pectin, add the calcium water early in the cooking process.) During the last 2-3 minutes of cooking, stir with a whisk to break up the fruit into a sauce, if desired.
Ladle into hot prepared jars, seal, and process in a boiling water bath for 10 minutes.yield: 5 8-oz jars
Oven-Roasted Strawberry Jam with Rosemary
adapted from Complete Book of Small-Batch PreservingCombine berries and sugar and allow to macerate, two hours (up to a day or so). Stir to mix in the sugar occasionally.
- 8 C strawberries, hulled and quartered lengthwise
- 4 C sugar
- 1/4 C lemon juice
- 4 sprigs clean fresh rosemary
In a large saucepan, add lemon juice and bring to a boil over high heat. Reduce heat a simmer, and continue cooking for 10 minutes.
Pour into two 13" x 9" pans, add two sprigs rosemary to each pan, and bake in a warm oven for 10-12 hours. (The directions say to use a 150F oven - the lowest my oven will do is 170F, so that's what I used. It worked fine. If using a convection oven, apparently the process only takes 2-4 hours.) Stir occasionally. Keep baking until the mixture has thickened and will form a gel.
Ladle into hot jars, seal, and process in a boiling water bath for 10 minutes.yield: 4 8-oz jars
Thursday, June 17, 2010
perfect kale
Wednesday: roasted chicken; sweet potato spears; "braised" kale
The Zuni Cafe roast chicken recipe is pretty much the only one I use. Once in a while I'll dally with another technique for roasting the bird, but I always come back to this. It is especially good if you have time to let the chicken rest for three days before cooking, though two or even one day of rest will still give you a delicious dinner.
I don't bother with the herbs - I don't think their flavor gets into any of the meat that's not in direct contact with them. I also have decided that the pan drippings are put to better use in a gravy than in the bread salad she suggests (I say this even after having had the chicken/bread salad at Zuni in SF... it's good, but not worth giving up gravy for). I usually add some stock to the pan after I take the chicken out, but this time I made the gravy with some white wine we had in the fridge - definitely a tasty addition.
Last night we also roasted some sweet potatoes while the chicken cooked - they were tossed with olive oil/salt/pepper. I think I ended up having them in the oven for about half the chicken's cooking time. I'd also planned to make Michael Ruhlman's braised kale, but as I started cooking I realised two things: I didn't have most of the ingredients, and my 475F oven was likely too hot. What I came up with was probably the best kale I've ever eaten, though, so it all worked out in the end.
Kale with Guanciale
inspired by Michael Ruhlman's braised kaleIn a large pan over medium-low heat, cook the guanciale until the fat is mostly rendered and the meat is beginning to crisp. Add the kale and turn the heat up to medium. Cook, stirring frequently, until it has started to wilt. Add a pinch or two of salt, a grind or two of pepper, and the red pepper flakes. Cover, and cook over medium-low heat for 15-30 minutes (honestly, I have no idea how long it was cooking for... until it looked done, I guess). When it's mostly cooked, add the honey and sherry. Cook off the liquid, taste, and add more salt or pepper as needed.
- hunk of guanciale, diced
- two large bunches kale, cleaned and cut into strips (don't dry it - you want the residual water clinging to the leaves)
- red pepper flakes
- 1 Tbsp honey
- glug or two sherry vinegar
- salt to taste
- pepper to taste
makes 3-4 servings
Monday, May 31, 2010
memorial day 2010
Monday: hot dogs; peanut-radish slaw; baked Pope's beans; sliced pickled shallots
The sun finally peeked out a big Monday afternoon, just in time for us to grill some hot dogs (actually called "country dogs" by the farm that sells them at the market). I also made some slaw - I followed the recipe fairly closely, but I think some cilantro would be a good addition. We didn't have any, though, and it was still great.
I warmed up the kitchen a little bit by making baked beans based on my favorite lentil recipe. Although I didn't add any this time, I do frequently add some crisped bacon to this dish (just 2 strips).
"Barbecue" Baked Beans
adapted from Cooking Light
- 4 cups cooked beans (reserve 1 C or so of the cooking liquid)
- 1 onion, diced
- 2/3 cup ketchup
- 1/3 cup maple syrup
- 1/4 cup prepared mustard
- 1/2 teaspoon ground ginger
- 1/2 teaspoon vanilla extract
- 1/4 teaspoon ground allspice
- 1/4 teaspoon black pepper
- 1/2 teaspoon salt
Preheat oven to 350°F.
Combine beans and diced onion in a baking dish. In a small bowl, combine remaining ingredients. Pour the ketchup mixture over the bean mixture, stirring to combine.
Bake, uncovered, at 350° for 1 hour. If the beans are getting a little too dry, add some of the reserved cooking liquid.
serves 6-8
Monday, May 24, 2010
baked eggs over croutons
Monday: baked eggs over croutons with mushrooms and asparagus.
Wow. Pretty much everything I've made from Vegetarian Suppers has been a success all around, and this was no exception. We made the recipe as directed and I dry sauteed some asparagus tips (left over from a chop salad last night - I only like to eat the stalks raw; the tips need cooking, IMO). The combination of flavors and textures pretty much knocked my socks off.
Wow. Pretty much everything I've made from Vegetarian Suppers has been a success all around, and this was no exception. We made the recipe as directed and I dry sauteed some asparagus tips (left over from a chop salad last night - I only like to eat the stalks raw; the tips need cooking, IMO). The combination of flavors and textures pretty much knocked my socks off.
eggs baked on a bed of mushrooms and croutons with asparagus tips
adapted from Vegetarian SuppersPreheat the oven to 400F. Prepare two shallow baking dishes (we used pasta bowls) by spraying with cooking spray or coating with butter.
- 2 Tbsp butter, divided into halves
- 2 slices bread, cut into small cubes
- 1 Tbsp olive oil
- 1 large finely diced shallot
- 1/2 lb mushrooms (cremini or portobello)
- 1 Tbsp chopped parsley
- 2 tsp chopped rosemary
- salt & pepper
- 1 Tbsp tomato paste
- 3/4 C red wine
- 2-4 eggs (adjust to fit your appetites)
- asparagus tips from ~2 lb asparagus
Melt half the butter in a medium skillet, add the bread, and toss to coat. Cook over low heat, stirring often, until browned and crisp but not hard (8-10 min). Divide the croutons between the dishes and set skillet aside.
Over medium heat, melt the remaining half of the butter in a large skillet with the olive oil. Add shallot and cook for about 3 minutes, stirring to prevent burning. Raise the heat to medium-high and add the mushrooms and most of the herbs. Sprinkle with salt and pepper.
Saute until the mushrooms have started to brown, about 5 min. Stir in the tomato paste. Add the wine and use it to deglaze the pan. Lower heat and simmer until the sauce has reduced to about 1/4 C. Season with a bit more salt and pepper and divide the mushrooms between the dishes.
Meanwhile, heat your first skillet over medium heat with just a tiny bit of additional oil (or use a squirt of cooking spray). Cook the asparagus for about 10 minutes. You don't need to move it around in the pan until it starts to sizzle. The asparagus is done when it's tender and tasty.
Make a shallow depression in the center of each mushroom mound, and break 1 or 2 eggs in each dish. Add a bit more salt and pepper. Bake until the eggs are to your liking (about 15 minutes). Remove, sprinkle with the remaining herbs and maybe a bit more salt and fresh-ground pepper, and serve.makes 2 servings
Sunday, April 25, 2010
I think it's actually spring now
I feel like this is the first real spring recipe I've made this year. Hello, Spring 2010 - I am so very glad to see you!
I love going to the farmer's market and letting a menu fall into place while I'm there, but that's not really possible during the winter. This recipe is the first thing I've just thrown together with farmer's market finds and stuff we have on hand.
I love going to the farmer's market and letting a menu fall into place while I'm there, but that's not really possible during the winter. This recipe is the first thing I've just thrown together with farmer's market finds and stuff we have on hand.
Morels and Asparagus with Pasta
inspired by this recipeHeat a large skillet over medium-high heat. Add the oil and the butter. Saute the green garlic and morels until the mushrooms have released their liquid and it's mostly cooked off (about 5-10 min).
- 1 Tbsp vegetable oil
- 2 Tbsp butter
- 1 bunch green garlic, white parts only, sliced
- 1/2 lb fresh morels, cleaned and sliced
- 1/2 water + 3/4 tsp "better-than-bouillon" (or 1/2 C broth)
- 1/4 C 2% milk
- 3/4 tsp Wondra (or flour)
- 1 Tbsp fresh tarragon, chopped
- salt & pepper to taste
Add asparagus and water or broth to the pan (if using bouillon, add it now, too). Simmer, covered, for 4 minutes or so (asparagus should be crisp-tender). Meanwhile, mix the Wondra or flour into the milk.
Add milk mixture and tarragon and continue cooking, uncovered, until the sauce has thickened (2-4 minutes more). Season to taste and serve over pasta.serves 2 if you want lots of veggies with your pasta
Thursday, April 22, 2010
Roasted Tangelo Marmalade with Rosemary
I'm not 100% sure that this "counts" for this month's Can Jam, but it's what I've had time to make this month. Also, it came out incredibly well, so it's worth sharing either way. (I was hoping my mint would be up so that I could make a lemon-mint concentrate syrup for the Can Jam, but our cold weather thwarted me.)
One of my very kind friends sent me some ultra-fresh citrus all the way from Arizona! I started a batch of preserved lemons and made this marmalade with the amazing tangelos she sent. I ended up making several batches.
The first one I overcooked, so that it darkened and caramelized slightly, but I have to admit that it's my favorite. It has an almost nutty quality that's incredible with the rosemary; I'm planning to use most of that batch as hamantashen filling since it also ended up being quite thick. I can't wait to have my dissertation finished so that I can get to the baking - I'm really eager to try the resulting cookies.
I also made a batch with thyme sprigs instead of the rosemary, but I haven't tried any of that yet.
Roasted Tangelo Marmalade with Rosemary
My recipe is adapted from this one.Roasting:
- 2 lb tangelos, scrubbed
- 1/2 C sugar per C of chopped citrus and juice (about 3 C)
- 1/4 C fresh lemon juice
- clean rosemary sprigs (1 per jar)
Cut tangelos in half, pick out the seeds, and put them cut-side down in a pan or cookie sheet(s). Roast in a 400F oven for 25 minutes (uncovered). Remove from the oven and let cool.
Making the marmalade, day 1:
When the tangelos have cooled, cut or dice them (peel and pulp) into shreds or very small (approximately 1/4-inch) rough cubes. Measure the chopped citrus and juice together. You should have about 3 cups. For each cup of chopped fruit and juice, measure into a large pot 1 1/2 cups of water.
Bring the citrus/water mixture to a boil. Reduce the heat and simmer for 30 minutes. Remove from the heat and allow to stand overnight (or at least 12 hours).
Making the marmalade, day 2:
For every cup of the fruit pulp and liquid , add ½ C sugar. Add the fresh lemon juice. Bring mixture to a boil, stirring until the sugar dissolves. Allow to boil until marmalade jells. This will probably take about 30 minutes – stir it occasionally until it sets, both to check the set and to prevent it from scorching on the bottom.
When the marmalade has jelled, ladle into hot jars, leaving 1/4 inch headspace. Add one rosemary sprig to each jar. Process in a boiling water bath canner for 10 minutes.Makes approximately 6 half-pint (1 cup) jars.
Thursday, March 4, 2010
Monday: Sausages; Marinara Sauce; Polenta
Monday: Sausages; Marinara Sauce; Polenta
Monday's meal was similar to this summer one, except that I actually did take the time to make the polenta. For a while we ate this (or something similar) about once a week, but we've been eating so much other meat recently that I've been skipping it. Still, yummy comfort food is yummy.
I made the polenta a little looser than I often do, so that it stayed more porridge-like when it was re-heated for our lunches the next day.
PolentaBring the water to a boil in a medium saucepan. Whisk in the polenta and salt, continuing to stir until the polenta no longer falls to the bottom of the pan when you stop stirring. Continue to simmer over low heat until cooked to your liking, 30-60 minutes. Stir in some olive oil and parmesan for flavoring and serve.
- 5 C water
- 1 C polenta
- ~ tsp salt
- olive oil
- parmesan
serves about 4
Sunday, February 14, 2010
your house will smell amazing!
Although this year I've resolved to "put up" more pickles and whole fruits, I still have a lot of jams and sweet preserves from last year (and a few from the year before that, truth be told). I'm trying to use them in new ways. One I hadn't really thought of previously is in baking, but when I saw this recipe for Marmalade Gingerbread, I knew the Lemon-Ginger Marmalade I canned last winter would be perfect for it.
I brought a loaf with me to the Madrona Fiber Arts Winter Retreat (which I've gone to every year I've been in Washington); the gingerbread was a hit with my knitting buddies.
I brought a loaf with me to the Madrona Fiber Arts Winter Retreat (which I've gone to every year I've been in Washington); the gingerbread was a hit with my knitting buddies.
Marmalade Gingerbread
adapted from Sensational PreservesPreheat oven to 310F. Prepare two loaf pans (I use baking spray with flour) and set aside.
- 1 1/4 C dark brown sugar
- 1 1/4 C skim milk
- 1/2 C butter, melted
- 1/2 C unsweetened applesauce *
- 2/3 C marmalade (any kind - each will be a bit different, obviously, but all should work, including store-bought) *
- 3 C all-purpose flour
- 4 1/2 tsp baking powder
- 1 1/2 tsp kosher salt
- 2 tsp baking soda
- 2 Tbsp ground ginger
- 2 tsp cinnamon
- 1 tsp freshly grated nutmeg
- 2 large eggs, beaten
- 7 pieces preserved ginger in syrup, chopped *
- 2/3 C plump raisins
Mix the milk and sugar together until sugar is dissolved. Add melted butter, marmalade, and applesauce, stirring until marmalade dissolves. In another bowl, mix the dry ingredients together and form a well in the center. Mix the marmalade mixture into the dry ingredients, stirring to make a smooth batter. Stir in the eggs. Stir in the chopped ginger and raisins.
Pour into your prepared pans and bake for 60-90 minutes, until risen and firm to the touch in the center. Leave to cool in the pan.
Store in an airtight container. From the recipe's headnotes: "This gingerbread is best kept for a couple of days before being eaten."makes 2 full-sized loaves
* If you have some home-canned versions of these, this would be a great recipe to use them in.
Wednesday, February 10, 2010
winter in the PNW curry
Wednesday: Red Curry with Winter Veggies; brown rice
This recipe ended up being a lot more work than I initially thought it would. I made some changes to cut down on that, and am changing the order of preparation around a bit so that it's easier to have everything ready to go at the right moment. Beyond that, I feel like, if I'm going to put this much time into making a curry, I should probably make the curry paste from scratch. Live and learn. It was tasty, though not amazing.
This recipe ended up being a lot more work than I initially thought it would. I made some changes to cut down on that, and am changing the order of preparation around a bit so that it's easier to have everything ready to go at the right moment. Beyond that, I feel like, if I'm going to put this much time into making a curry, I should probably make the curry paste from scratch. Live and learn. It was tasty, though not amazing.
Red Curry with Winter Veggies
adapted from Vegetarian Suppers from Deborah Madison's Kitchen
time, start to finish: about 1 hourSteam sweet potatoes & kale until the potatoes are softened (10-20 minutes over boiling water, or about 10 minutes in the microwave).
- 1 lb sweet potatoes, peeled and cut into chunks
- 1 bunch kale, chopped
- 1 carton firm tofu in water, drained, patted dry, and cut into 1" cubes
- 1 can coconut milk
- 1 C water
- 2 tsp Thai red curry paste
- 1/2 C chopped cilantro, plus some sprigs for garnish
- 2 tsp peanut oil
- salt
- 2-3 tsp soy sauce
- 6 large shallots, peeled and sliced into rounds
- sugar
- 1 lime, cut into wedges
- small handful roasted peanuts, chopped
Meanwhile, cook the tofu: heat a large nonstick skilled over medium heat with a little cooking spray in the pan. Let them sit for about 5 minutes without moving them, then turn them over (I do this one at a time carefully using my fingers - YMMV). Cook for another 2 minutes or so, until they're starting to look like a lot of the water has been cooked out. Turn again, and cook for another minute. The sides that have been cooked should be golden brown. Sprinkle salt and soy sauce over them, and cook for another few minutes until the soy sauce is pretty well evaporated and the tofu cubes have a soy sauce glaze.
In a large saute pan, heat the coconut milk, water, and curry paste. Whisk the mixture to fully break up the curry paste. Once it's come to a simmer, stir in the (drained) sweet potatoes and kale, the chopped cilantro, and the tofu cubes. Continue to simmer over low heat while you prepare the shallots.
Wipe out your nonstick pan and heat it again over medium-high heat. Heat the peanut oil and add the shallots. Sprinkle with a little salt and sugar and caramelize them slightly (about 8-10 minutes). When caramelized, mix into the simmering curry.
Serve over rice, with lime wedges, a bit more cilantro, and more salt and/or sugar, to taste.serves 4
Tuesday, February 9, 2010
catching up
I'm back from Boston, where I spent my time whipping up a variety of freezable meals, had a fantastic meal at Hungry Mother, and generally had a lovely time.
Cooking has been a bit light around here, and will continue to be so for a while. I'm finishing the writing on my doctoral thesis, and much as I'd love to escape to the kitchen, I need to focus on that for a while. Here's what we've been up to food-wise this week:
Sunday: Plumped Ginger-Caramel Shrimp; brown jasmine rice
This is, so far, the only shrimp recipe I've used. Eating seafood is a relatively new thing for me, and I still am somewhat hesitant to cook it. This was my second time making it, and it was (again) delicious. I made a 1/3 recipe:
The brown rice was partly a chance to play with my new toy - a rice maker that will cook it! Our old Zojirushi was wonderful, but basically couldn't cope with brown rice. The new one is smaller (we just got a 3C, since I found a fabulous deal on that size), but still makes enough rice for 4 people. Or for the two of us, plus enough leftovers for fried rice the next day:
Monday: Ginger Fried Rice with a Fried Egg
Victor made this - it was amazingly good and didn't seem to take too long. Definitely an addition to our regular rotation, since it has a lot of room for improvisation, but the crispy bits of garlic and ginger really take this particular version beyond most fried rice recipes. For this time, though, he just made the recipe as detailed on Smitten Kitchen.
Cooking has been a bit light around here, and will continue to be so for a while. I'm finishing the writing on my doctoral thesis, and much as I'd love to escape to the kitchen, I need to focus on that for a while. Here's what we've been up to food-wise this week:
Sunday: Plumped Ginger-Caramel Shrimp; brown jasmine rice
This is, so far, the only shrimp recipe I've used. Eating seafood is a relatively new thing for me, and I still am somewhat hesitant to cook it. This was my second time making it, and it was (again) delicious. I made a 1/3 recipe:
Plumped Ginger-Caramel Shrimp
adapted from The Splendid Table's How to Eat Supper
for the brine:In a medium bowl, mix together the non-shrimp brine ingredients. Add the shrimp, and let stand for 20 minutes while you chop the other ingredients (at room temp for frozen shrimp, and in the fridge for fresh).
- 1/2 C kosher salt
- 1/3 C sugar
- 1/3 C medium-hot chile powder
- 2 qts water (warm if using frozen shrimp, cold if using fresh)
- 1 1/2 lb shrimp (in or out of their shells)
for the saute:After they've been brining for 20 minutes, drain the shrimp. Peel them if necessary and pat them dry. Heat the oil in a saute pan over medium-high heat. Stir in the garlic, ginger, pepper, and salt. Cook for about a minute, stirring to let all the aromatics come into contact with the hot oil. Add the sugar and keep cooking until the garlic is pale gold - the line between slightly darkened and burnt is a fine one in this dish, so be watchful. Drop in the shrimp and stir for another 2 minutes or so, until the shrimp are turning pink and are barely firm.
- 4 large garlic cloves, grated
- 4" piece ginger, peeled and grated (you could mince both this & the garlic, but I like to use my microplane on 'em)
- 1/4 C vegetable oil
- a few grinds of black pepper
- a sprinkle of salt
- 4 tsp sugar
serves 4, very generously
The brown rice was partly a chance to play with my new toy - a rice maker that will cook it! Our old Zojirushi was wonderful, but basically couldn't cope with brown rice. The new one is smaller (we just got a 3C, since I found a fabulous deal on that size), but still makes enough rice for 4 people. Or for the two of us, plus enough leftovers for fried rice the next day:
Monday: Ginger Fried Rice with a Fried Egg
Victor made this - it was amazingly good and didn't seem to take too long. Definitely an addition to our regular rotation, since it has a lot of room for improvisation, but the crispy bits of garlic and ginger really take this particular version beyond most fried rice recipes. For this time, though, he just made the recipe as detailed on Smitten Kitchen.
Monday, January 25, 2010
thai-ish
Monday: Spicy Basil Chicken; kalijira rice
First, a quick note about the rice - kalijira, a tiny and aromatic rice, is from Bangladesh, which currently has banned rice exports. While good for the people of Bangladesh (... I hope!), since it will theoretically make rice more affordable there, it is sad for me. I love kalijira rice probably more than is reasonable, and it's very very difficult to get in the U.S. right now. We still have a small amount, and while I *could* just eat it unadorned (truly, it is a wonderfully tasty rice), I made some for dinner tonight.
The chicken was adapted from a Cook's Illustrated recipe. Their method is fairly involved; below is my version:
Spicy Basil Chicken
adapted from Cook's IllustratedIn a food processor, process half the basil, plus the garlic and chiles until finely chopped, but not a paste (10 or so pulses). Mix together just a Tbsp of the basil mixture, half the fish sauce, and the soy sauce and vinegar; set aside.
- 2 C fresh basil leaves (tightly packed), divided
- 3 peeled garlic cloves, cut in half
- 6 red thai chiles, stemmed and cut in half (if you want to make the dish less spicy - and it is pretty hot - seed them, too)
- 2 Tbsp fish sauce, divided
- 1 Tbsp soy sauce
- 1 tsp white vinegar
- 1 Tbsp sugar
- 1 lb boneless, skinless chicken (either breasts or thighs), cut into medium pieces
- 3 shallots, peeled and thinly sliced (between 3/4 & 1 C total)
- 2 Tbsp vegetable oil
Heat the oil in a large non-stick skillet over medium heat and add the basil mixture from the food processor (you don't need to clean it out, or even scrape it very thoroughly). Add the shallots, too. Sprinkle with the sugar and cook, stirring occasionally, until the shallots are starting to brown (about 10 minutes).
Process the chicken and the remaining fish sauce (1 Tbsp) in the processor until the meat is in small pieces, but not a paste (about 8 pulses). Once the shallots are browned a bit, add the chicken and cook until most of the pink is gone, breaking up the pieces with a spatula (3-4 minutes). Add the basil, fish sauce, etc. mixture to the pan and cook until the chicken is no longer pink, stirring as needed (1-2 minutes). Stir in the remaining basil and cook until the basil is just wilted (about 1 minute).serves about 3 (just add a bit more chicken if you have a 4th person)
Friday, January 22, 2010
hot buttery lemon!
I had a very full night of cooking this evening: when I read Heidi's post about her freezer-clearing Ribollita, I was inspired to clear out my own freezer. Although the soup itself's a post for another day (we haven't eaten it yet), the recipe has quite a lot of waiting while things simmer for 10 or 15 minutes.
We had a big bag of clementines that needed to get used up - I used to be able to eat a pound or so of them at a sitting, but apparently I am getting old, so now even one gives me heartburn. (... perhaps because I used to eat them in 1-pound increments).
Anyway, I decided to use my simmering time productively, and started cutting them into quarters. I'm trying to make fewer very sweet preserves this year, and I love pickles (really, anything vinegary), so when I was looking for a recipe for the Can Jam I had bookmarked this recipe for pickled oranges, too. Since I had surplus clementines, that turned into pickled clementines instead. I changed the spices somewhat, and decided to add a vanilla bean. It smells good, but since these pickles are supposed to mature for two months before you eat them, it'll be a while before I know whether this was a good experiment or not.
Also, since I was already zesting a lemon for the soup, I decided to juice it, plus half of a somewhat-elderly red grapefruit I had sitting around, and make a quick batch of grapefruit curd. It's delicious (who can resist any kind of citrus curd??), but not quite as grapefruity as I might have liked.
We had a big bag of clementines that needed to get used up - I used to be able to eat a pound or so of them at a sitting, but apparently I am getting old, so now even one gives me heartburn. (... perhaps because I used to eat them in 1-pound increments).
Anyway, I decided to use my simmering time productively, and started cutting them into quarters. I'm trying to make fewer very sweet preserves this year, and I love pickles (really, anything vinegary), so when I was looking for a recipe for the Can Jam I had bookmarked this recipe for pickled oranges, too. Since I had surplus clementines, that turned into pickled clementines instead. I changed the spices somewhat, and decided to add a vanilla bean. It smells good, but since these pickles are supposed to mature for two months before you eat them, it'll be a while before I know whether this was a good experiment or not.
Pickled Clementine Quarters
adapted from Sensational PreservesWash clementines thoroughly and quarter them if they are small (mine were tiny) or cut into wedges if they are larger. Put them into an oven-safe pot and add water to cover. Simmer for 20-30 minutes or until the peels are tender.
- 2 lbs clementines (or so - enough to make about 8 C cut-up fruit)
- 2 1/4 C sugar
- 6 whole cloves
- 1 thumb-sized hunk ginger, peeled and chopped
- 5-in piece cinnamon stick
- 1 Tbsp allspice berries
- 1 whole star anise
- 1/2 vanilla bean, split
- 2 1/2 C white wine vinegar
Meanwhile, make the brine: heat the sugar with the spices and vinegar, stirring until the sugar has dissolved. Bring to a boil and turn down the heat to a simmer; simmer for 10 minutes.
Preheat the oven to 275F.
Drain the clementines, discarding the cooking liquid. Put the fruit back in your oven-safe pot and pour the brine over it. Cover and cook in the hot oven for an hour, until the peels are translucent. (NOTE: mine never got translucent - I hope it doesn't matter too much!)
Using a slotted spoon, transfer the oranges to your prepared jars (warm, clean, etc.). I really packed 'em in there, being careful to distribute the spices amongst the jars. Boil the vinegar on the stove for an additional 10 minutes (keep the jars with the fruit in the off but still-warm oven). Pour the brine over the fruit to cover. Rotate the jars to expel any air bubbles.
Process in a boiling water bath canner for 10 minutes. Store in a cool, dark, dry place for 2 months before eating.makes 3-4 pints
Also, since I was already zesting a lemon for the soup, I decided to juice it, plus half of a somewhat-elderly red grapefruit I had sitting around, and make a quick batch of grapefruit curd. It's delicious (who can resist any kind of citrus curd??), but not quite as grapefruity as I might have liked.
Microwave Grapefruit Curd
adapted from the Complete Book of Small-Batch PreservingPut the lemon juice and however much of the grapefruit juice it takes to make 1/2 C liquid total into a 4-C container. Add the sugar and butter and microwave on 100% power for ~2 minutes until the butter is melted. Whisk until the sugar dissolves.
- 1 lemon, juiced
- 1/2 grapefruit, juiced
- 1/4 C butter
- 3/4 C granulated sugar
- 2 eggs, beaten
SLOWLY add the hot buttery lemon mixture to the eggs, whisking constantly so that the egg doesn't begin to cook. After you've added all the hot liquid to the eggs, microwave for another 1-3 minutes on 50% power, stirring every 30 seconds. Keep going until the mixture has visibly thickened, but don't allow it to come to a boil. Pour into a clean, dry jar and enjoy! (Keeps for several weeks in the fridge, apparently, if you don't eat it first.)makes about 1 3/4 C curd
Sunday, January 17, 2010
umami-heavy tofu dinner
Sunday: Miso-Topped Seared Tofu; Garlicky Kale; rice
Yep, it's that same kale we had last week, though on a very different menu. The tofu is from Vegetarian Suppers from Deborah Madison's Kitchen.
Yep, it's that same kale we had last week, though on a very different menu. The tofu is from Vegetarian Suppers from Deborah Madison's Kitchen.
Skillet-Seared TofuSlice the tofu into about 6 sections and blot well with paper towels. Heat the oil in a large skillet and add the tofu, sprinkle it with salt, and cook over medium-high heat until golden. Flip over and cook until the second side is also golden brown. Then, shake some soy sauce onto each piece and keep cooking until it evaporates, giving the tofu a nice glaze. Serve with the scallions and peppers.
- 1 carton firm tofu packed in water, drained
- 2 tsp olive oil or vegetable oil (or cooking spray if using non-stick skillet)
- sea salt
- several dashes tamari soy sauce
- slivered scallions and thin red & green bell pepper strips
serves 2-4
Miso SauceMix everything together or blend in a food processor until smooth. Preheat the broiler and set the seared tofu sections on a piece of foil on a cookie sheet. Top each with a thick-ish smear of the miso sauce and broil until blistered (2-3 minutes).
- 1/3 C white (shiro) miso
- 2 Tbsp mirin
- 2 tsp grated fresh ginger
- 1 garlic clove, minced or grated
- 1 tsp roasted sesame oil
- small splash tamari soy sauce
- 3 Tbsp mayonnaise
Cold-Soother Jelly

This jelly combines citrus with a generous dollop of ginger and is sweetened with honey instead of sugar, for the ultimate in sore throat/stuffy nose soothing. It's the perfect thing for your toast the morning you wake up and notice an odd scratchy feeling at the back of your throat. Or when you have the flu. Or a cold. Or just want a little citrusy pick-me-up.
I made this jelly as part of Tigress' Can Jam, an event that challenges food bloggers to can a specific seasonal ingredient once a month. One of my resolutions is to space out my canning projects so they don't make me mildly insane a few weekends a year, and the Can Jam is a great way to keep myself honest and inspired. The process of picking this recipe led me to a few other seasonal canning treats, too, so expect to see some pickled oranges here soon.
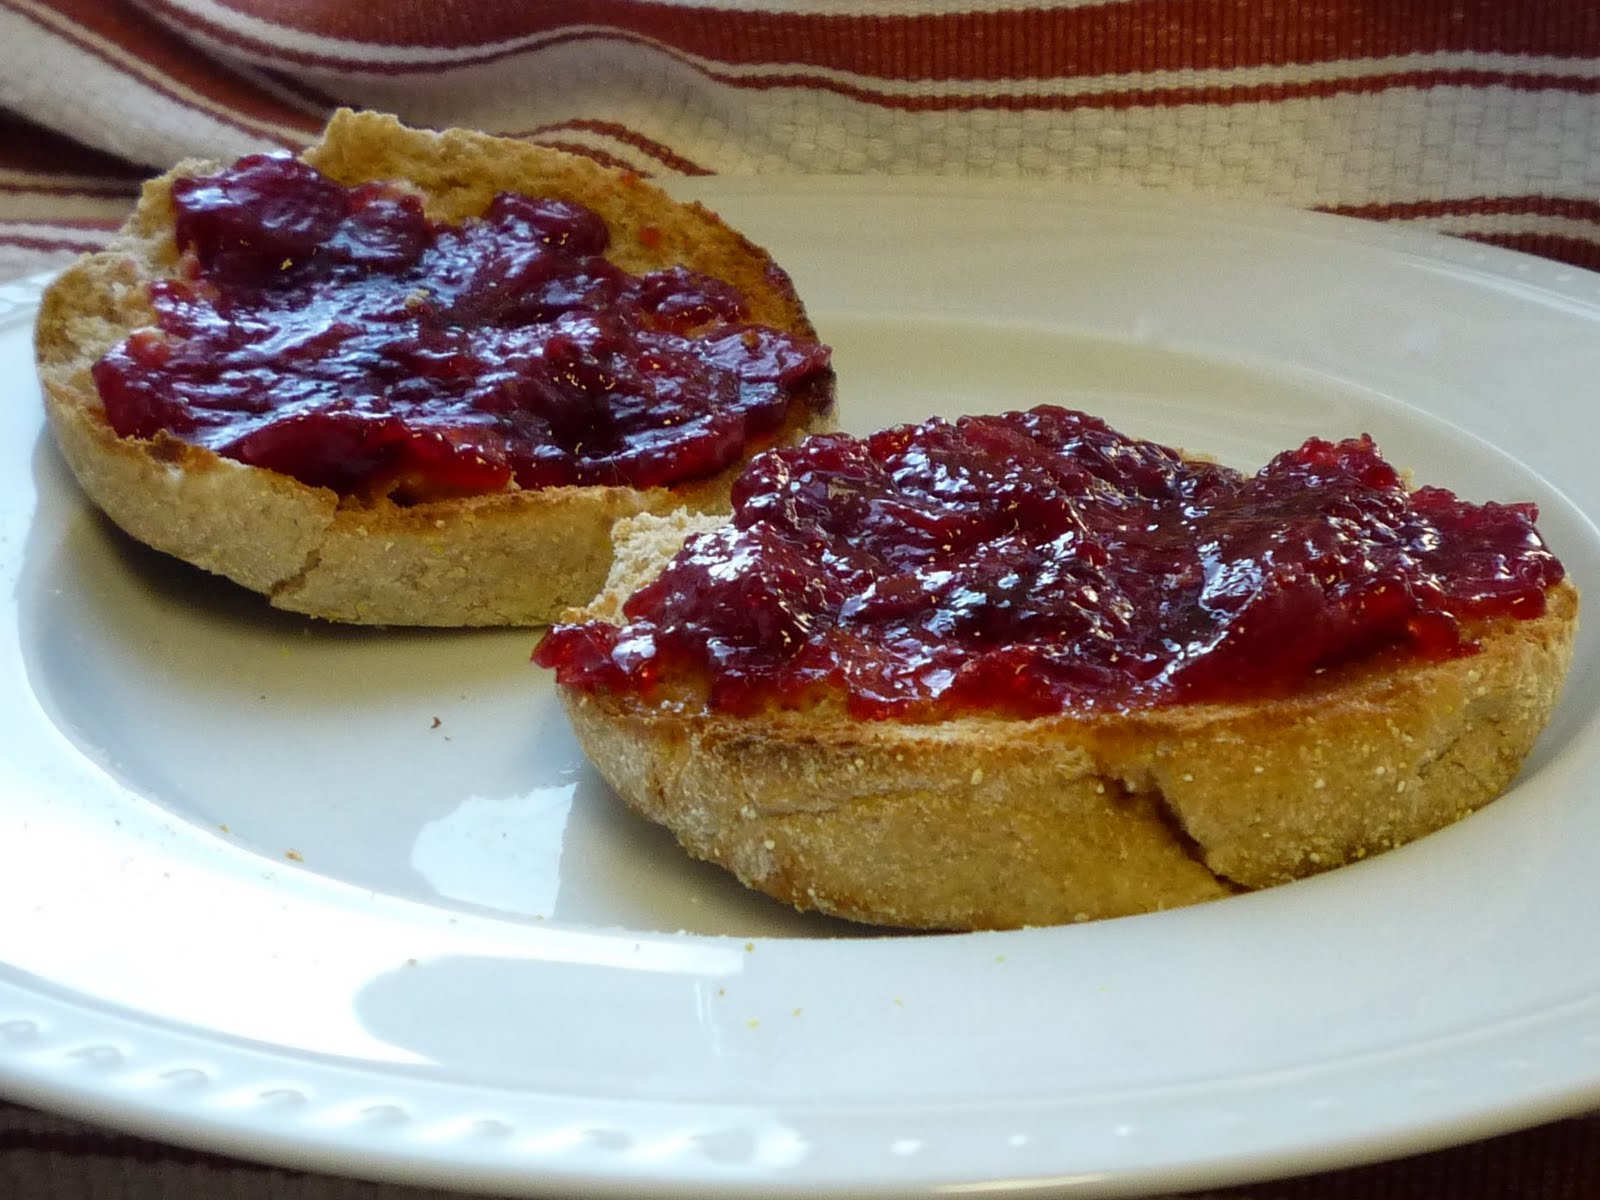
Since this was my first time making jelly, I picked a recipe that doesn't call for a jelly bag. (I think you don't need one because there isn't whole fruit to be separated out). I'm really happy with how it turned out - it's nicely balanced, so that you can taste the flavors of the ginger, lemon, and honey about equally. It is especially lovely on scones or English muffins.
If you wanted to really dote on someone when they were sick, you could bring them a few trashy magazines, some tissues, and a loaf of bread with this jam.
Cold-Soother Jelly
adapted from The Food Lover's Guide to CanningCombine the juices and honey in a large pan over high heat and bring to a boil. Add the ginger, stir, and bring back to a boil. Once you've achieved a vigorous boil, stir in the pectin. Continue boiling for exactly one minute after the mixture has returned to a vigorous boil. Remove from heat immediately, stirring for a few minutes to keep the ginger pieces from sinking to the bottom. Ladle into sterilized jars, leaving 1/4 in headspace, and process in a boiling water bath canner for 5 minutes.
- 1/2 C fresh-squeezed lemon juice (from about 2 large lemons)
- 1/4 C fresh-squeezed lime juice (from about 2 medium limes)
- 2 C honey
- 1/4 C crystallized ginger, minced
- 3 oz liquid pectin
3-4 half-pint jars
Update: I added a photo of the jelly; yes, I've just been eating it with a spoon!
Saturday, January 16, 2010
braised chicken
Friday: Tomato and Onion Braised Chicken; fresh bread
This is my favorite braised chicken recipe. Once you get over having to brown the chicken for a long(ish) time, there's really not much to it, and it works equally well on the stove-top or in the oven. I made it on the stove this time, since I was baking the bread at 450F during part of its cooking time. (Overall, I prefer to make it in the oven, since it is easier to control the temperature in there.)
This is my favorite braised chicken recipe. Once you get over having to brown the chicken for a long(ish) time, there's really not much to it, and it works equally well on the stove-top or in the oven. I made it on the stove this time, since I was baking the bread at 450F during part of its cooking time. (Overall, I prefer to make it in the oven, since it is easier to control the temperature in there.)
Chicken Legs Braised with Tomatoes, Onions & Garlic
adapted from The Art of Simple Food
- 4 chicken legs, seasoned with salt and fresh-ground black pepper (can do up to a day or two in advance)
- olive oil
- 2 onions, sliced
- 4 garlic cloves, sliced thinly
- 1 bay leaf
- sprig rosemary
- 2 tsp dried oregano
- 4 tomatoes, diced coarse, or 1 small (12 ounce) can organic whole tomatoes, diced (including juice)
- 1/2 C - 2 C chicken broth
Heat a heavy-bottomed pan over medium heat and add sufficient olive oil to coat the bottom of the pan. Place the chicken legs into the pan skin side down and cook until crisp and brown, about 12 minutes. Turn and cook for another 4 minutes. (Watch out - there's likely to be a lot of splattering oil during this process!)
After it's browned, remove the chicken and add the onions, cooking until beginning to get translucent (5 min or so). Add the garlic, rosemary, and oregano and cook for another 2 minutes. Add the tomatoes and use their juice to deglaze the pan, scraping up any brown bits from the bottom.
Arrange the chicken in the pan, skin side up, and pour in any juices that have collected. Pour in enough chicken broth to reach halfway up the chicken.
Bring to a boil and then turn down to a simmer. Cover and cook at a bare simmer or in a 325° oven for 45 minutes. Discard the bay leaf. Taste for salt and adjust as needed. Serve as-is, or shred the meat from the bone and mix into the vegetable mixture. (Shredding the meat first is nice if you'd like to serve the chicken over pasta instead of with bread.)serves 4
Subscribe to:
Posts (Atom)